
Installation
Maintenance
INSTALLATION
INSTALLATION
PREPARATION
1. Flooring Products
Wayflor products are made of Woven Vinyl Material backed with PVC + Glassfiber inner. Our flooring products have unique designs and textures with attributes including being waterproof, anti-bacterial, colorfast to light and easy care, making them suitable for both indoor and outdoor use. Wayflor products are finished in four ways from which customers may choose: roll-packed in two meter wide, floor tile in 50cm squares, 25cm x 75cm planks, and various custom shapes.
2. Adhesives
To achieve a better adhesive result, choose the proper glue based on applicable usages and installation areas. Always follow user guides from the adhesive suppliers. The following is a simple guide on choosing the proper glue:
3. EZ Care Coating
For indoor and higher levels of foot traffic like hotels, food service areas, retail stores, and offices that require higher dirt-resistance and extended wear, Wayflor applies an EZ CARE coating to all Wayflor products.
4. Cold Weld Sealer
For roll installation, all the joints must be sealed with cold-weld sealer, ex. Use sealer from approved supplier list.
5. Stair Edge Protection Molding
For stair installations, a protection molding is required for the front edge of each stair. (See Figure 1)
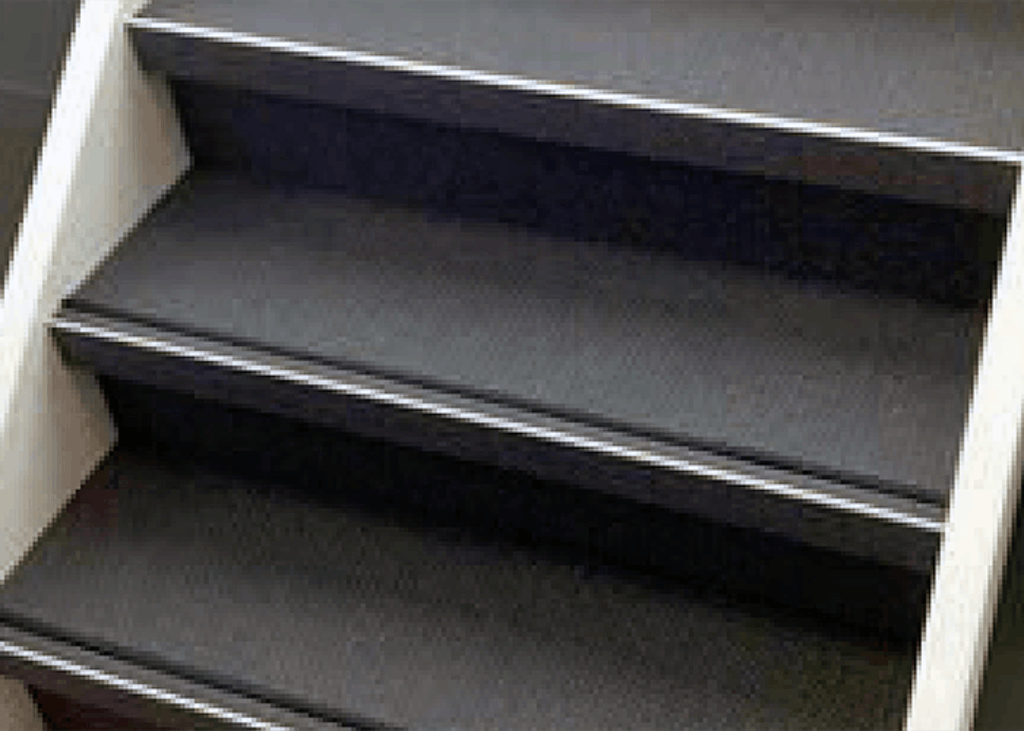
Figure 1.
INSTALL ROLLS
1. Choose your flooring option from one of WayflorЁЏs multiple designs. To install the flooring successfully, the floor must be completely level. For ceramic or cement sub-floors, use a self-leveling cement. If the sub-floor is level but not flat, use a quick-drying cement. Be sure to apply primer to the subfloor for best results.
2. To install Wayflor product on concrete sub-floors, apply primer all over the sub-floor with roller. Mix self-leveling cement according to manufacturerЁЏs instructions and apply to the subfloor, using the roller to erase air pockets and bubbles. Allow 24 hours to dry.
3. Sand floor using a commercial sander. Floor should be level and even. Vacuum the sanding dust, drawing the installation line. Unroll the product and allow it to relax prior to installation.
4. Cut each piece to required length of floor, making sure all arrows on the back side of the flooring face the same direction. Overlap each piece by 3 to 4cm (See Figure 2) and cut at the seam for a smooth surface. For designs with repeats like the Herringbone design shown in Figures 3 & 4, measure the right repeat and then cut along repeat.
5. Use a straight knife to cut through the overlapping thickness one time. Use a guiding cutter for the best results. Remove the top and bottom waste.
6. After cutting, ensure sub-floor is clean. Lift half of the flooring product and apply glue with correct recommended trowel type. After waiting the recommended curing time, fold back onto glued floor. For indoor use, an acrylic base glue can be used and if for heavy traffic, outdoor or waterproof flooring, Wayflor recommends a polyurethane (PU) glue. Use glue from approved supplier list. Trim the edge, use an edge trimmer to remove excess flooring product.
7. To eliminate air pockets, use the heavy roller to press firmly on the entire surface of the floor. After installing the first repeat, use the same method to complete the balance of the floor surface.
8. Cold weld sealing: Use recommended cold weld sealing products to achieve the best condition of the joint seam.
9. The installation is now complete! If further construction or furniture installation is needed please use proper protection of the new Wayflor.
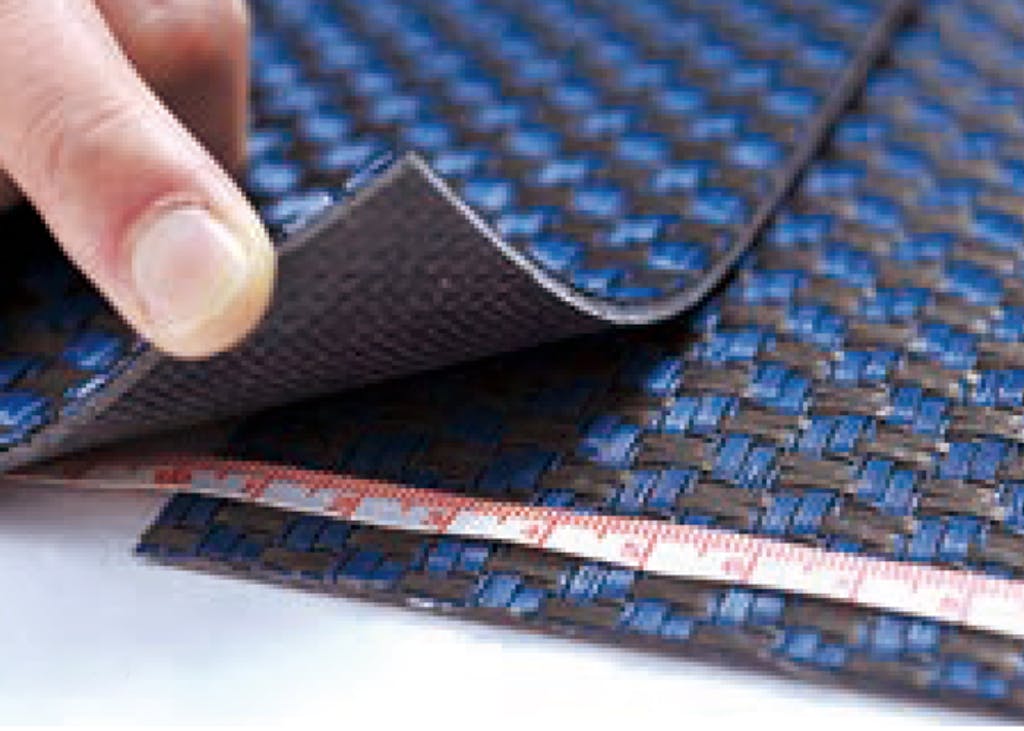
Figure 2.
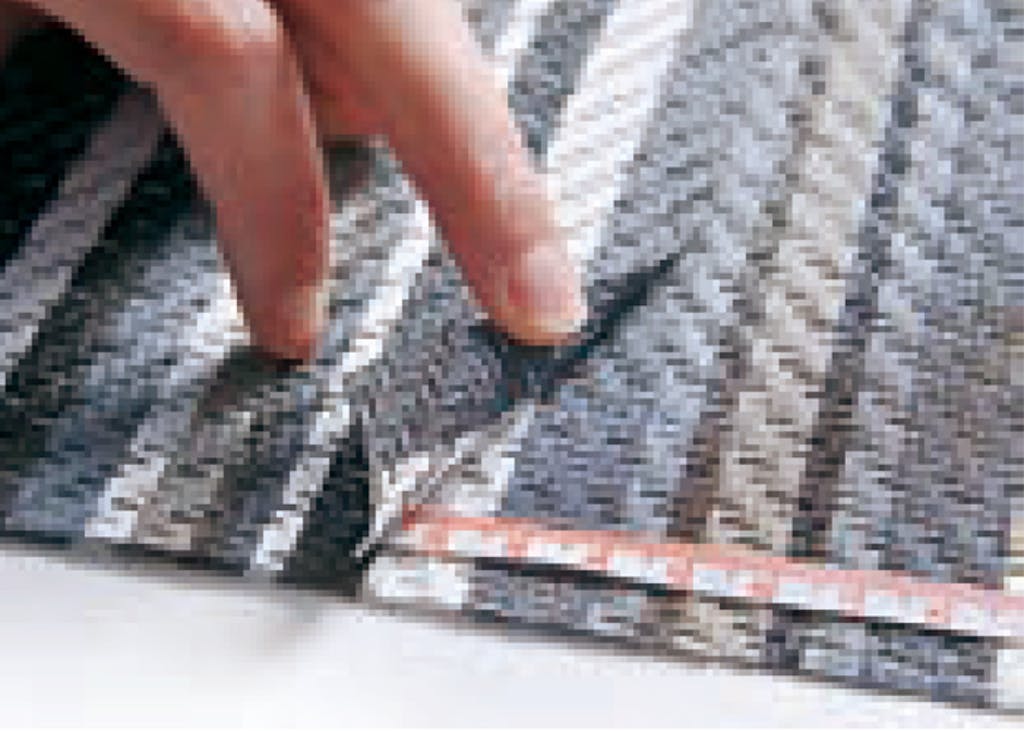
Figure 3.
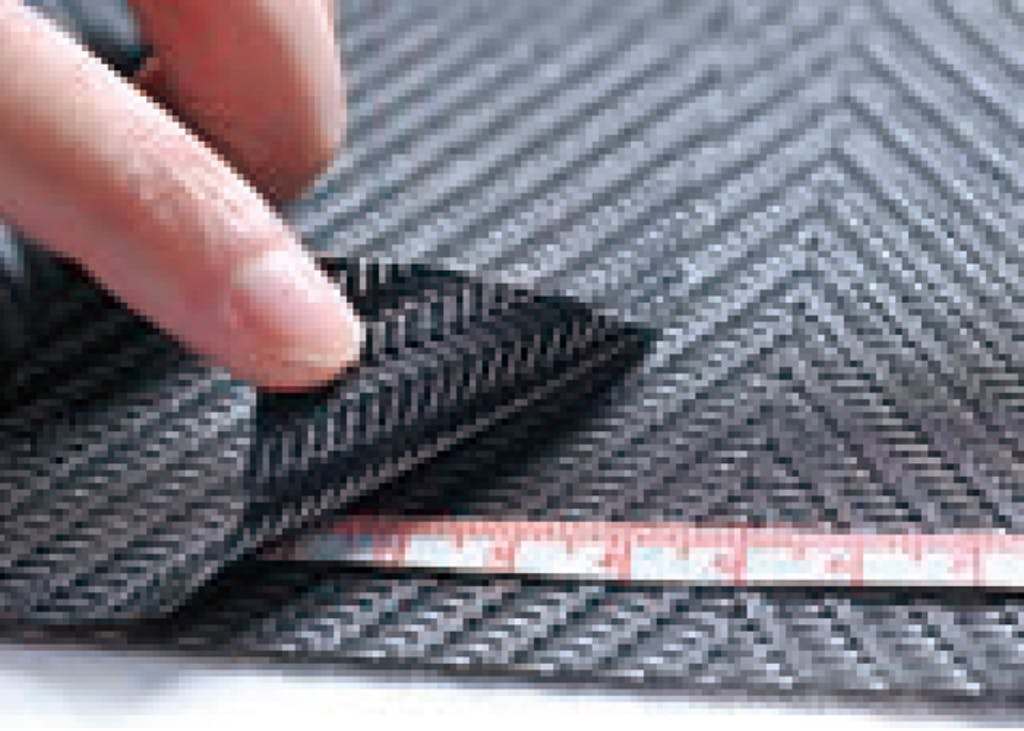
Figure 4.
INSTALL TILES OR SHAPES
1. Choose your flooring option from one of WayflorЁЏs many design options.
2. In order to install the flooring successfully, floor must be completely level. For ceramic or cement sub-floors, use a self-leveling cement. If the sub-floor is level but not flat, use a quick-drying cement.
3. If the sub-floor is wooden, use a polyurethane (PU) glue to prevent the wooden substance from warping. Use PU glue from approved supplier list and curing agent along with a trowel. Mix according to manufacturerЁЏs instructions on the glue. Only mix as much glue as necessary, as the glue cannot be re-used again after curing agent has been added. Choose a trowel that allows for even application of the glue.
4. Now create the design for installation of the new floor. Install plans normally start from the center of the installation, but this is using another plan. Draw the center line (See Figure 5), apply glue with trowel, and wait for the correct time for installation. Installation must be completed before the floor is completely dry.
5. Use the following tessellate installation method (See Figure 6), and only the products from same production lot/tone # can allow installation in the same direction (See Figure 7,8,9) to avoid color variation.
6. Once half of the installation is complete, start the second half of the room.
7. After installation, trim the edges; use an edge trimmer to cut excess flooring.
8. To eliminate air pockets, use the heavy roller to press firmly (See Figure 10) on the entire surface.
9. The installation is now complete!
10. If further construction or furniture installation is necessary, please use proper protection of the new Wayflor.
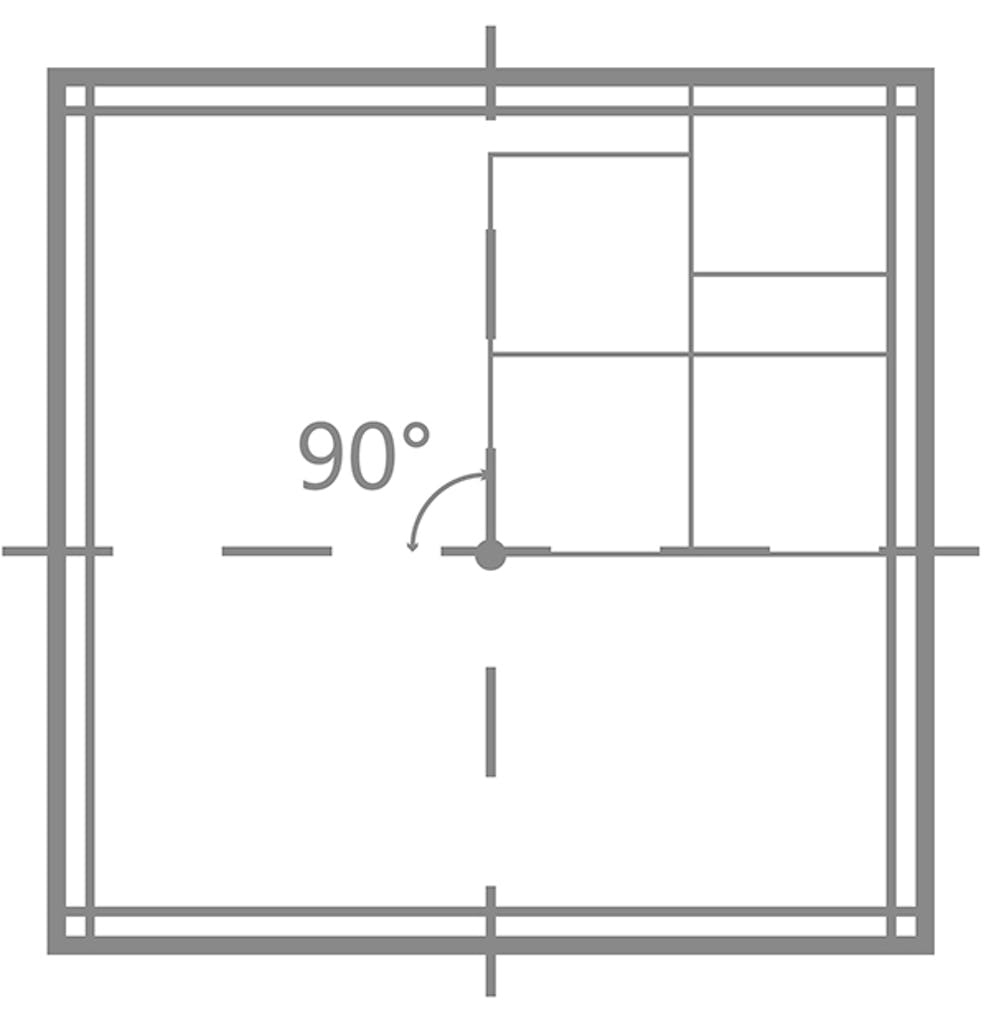
Figure 5.
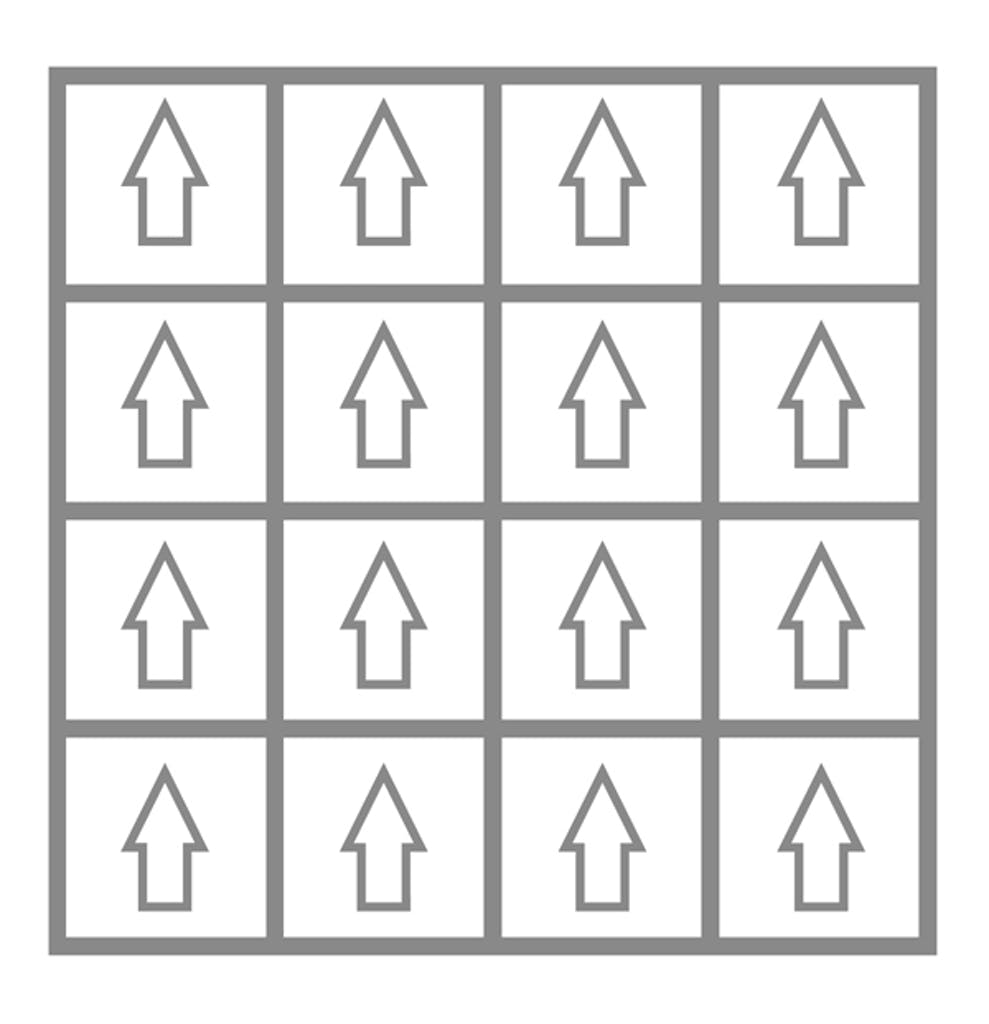
Figure 6.
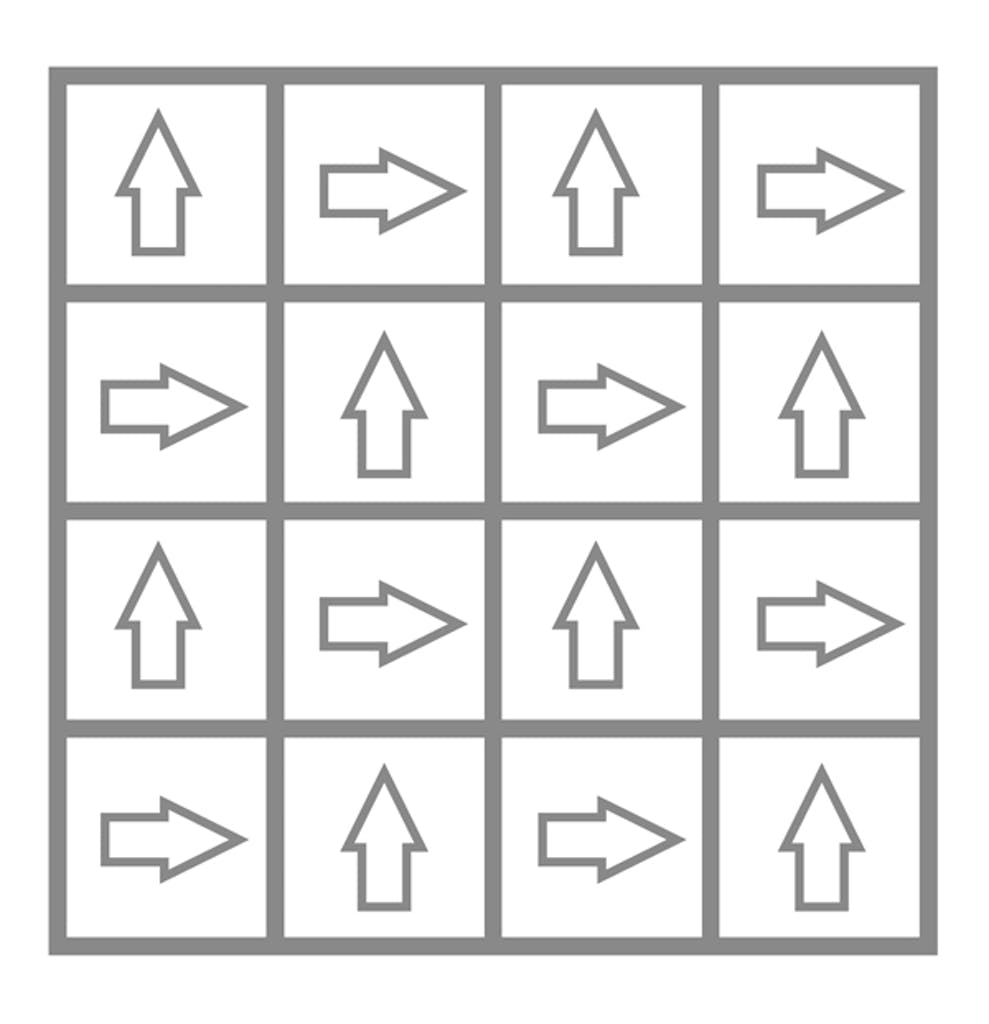
Figure 7.
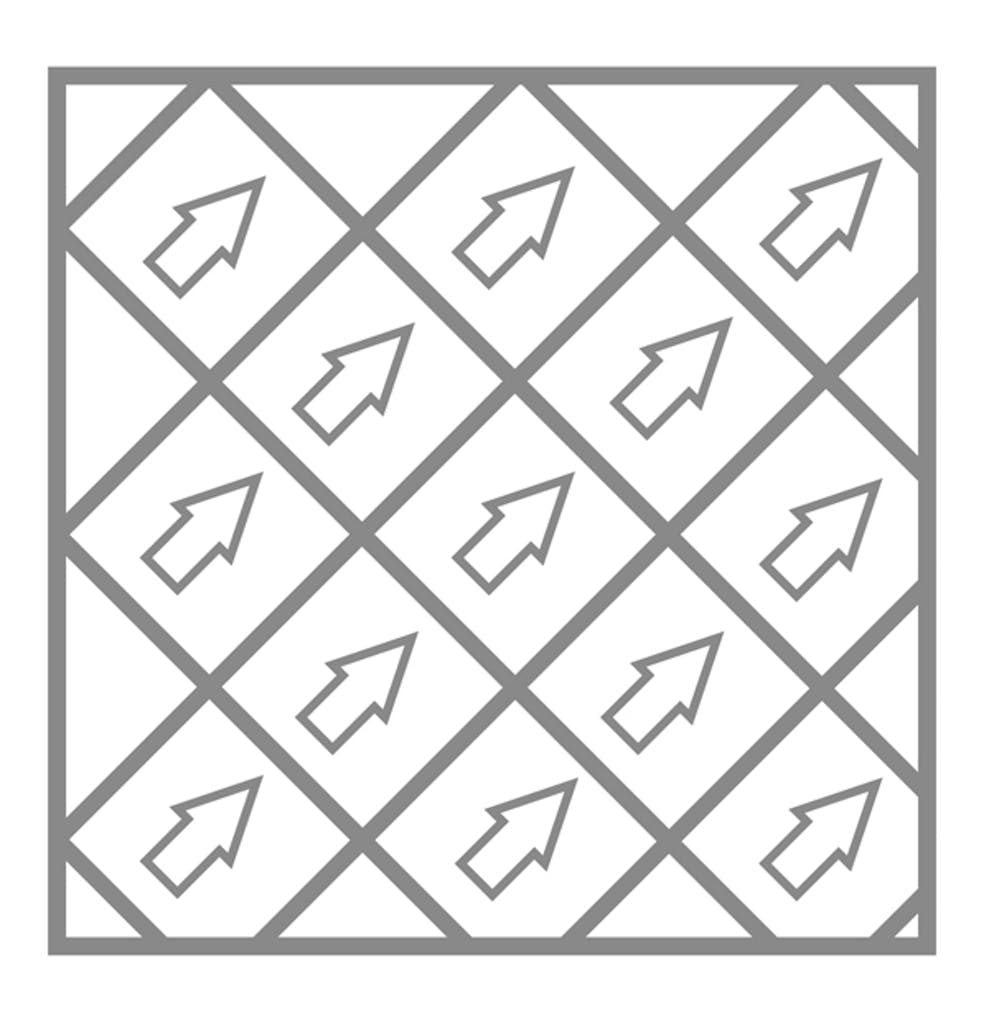
Figure 8.
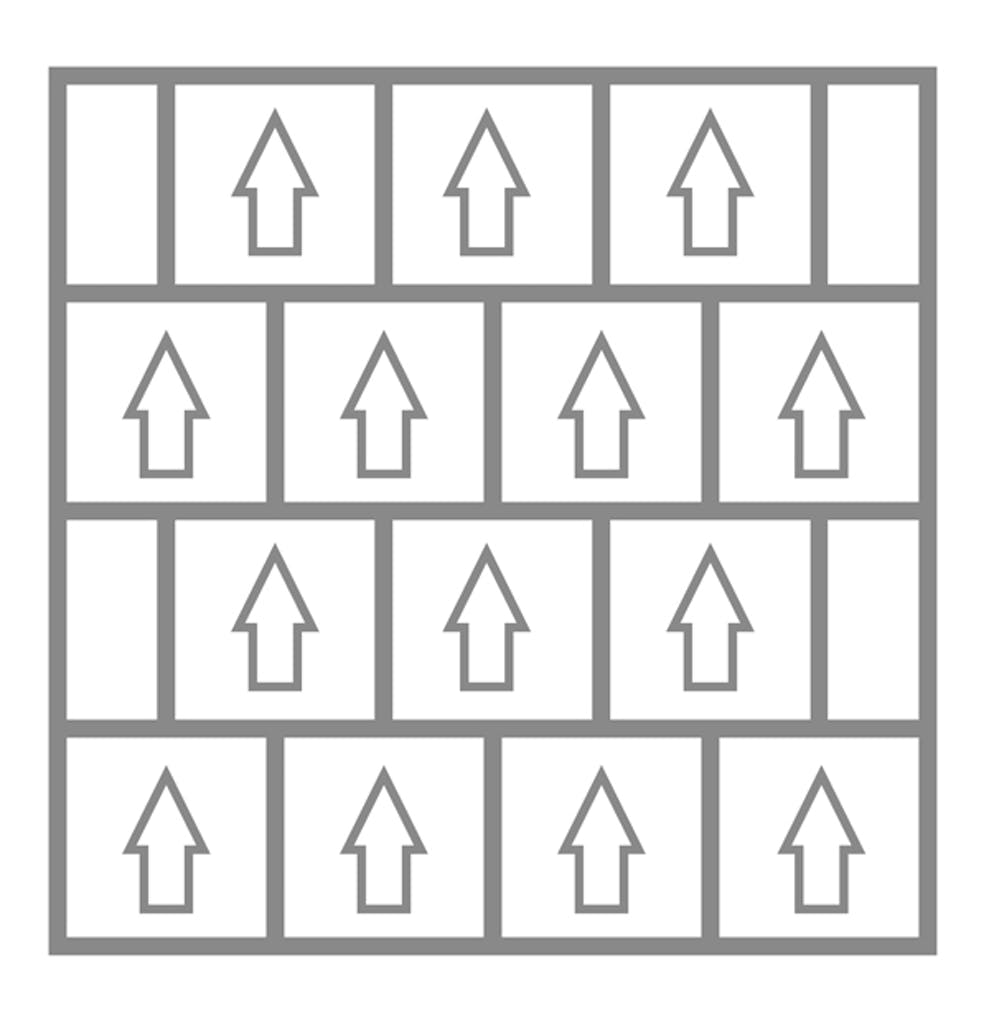
Figure 9.
CLEAN UP AND FINISH
1. Choose your flooring option from one of WayflorЁЏs many design options.
2. In order to install the flooring successfully, floor must be completely level. For ceramic or cement sub-floors, use a self-leveling cement. If the sub-floor is level but not flat, use a quick-drying cement.
3. If the sub-floor is wooden, use a polyurethane (PU) glue to prevent the wooden substance from warping. Use PU glue from approved supplier list and curing agent along with a trowel. Mix according to manufacturerЁЏs instructions on the glue. Only mix as much glue as necessary, as the glue cannot be re-used again after curing agent has been added. Choose a trowel that allows for even application of the glue.
4. Now create the design for installation of the new floor. Install plans normally start from the center of the installation, but this is using another plan. Draw the center line (See Figure 5), apply glue with trowel, and wait for the correct time for installation. Installation must be completed before the floor is completely dry.